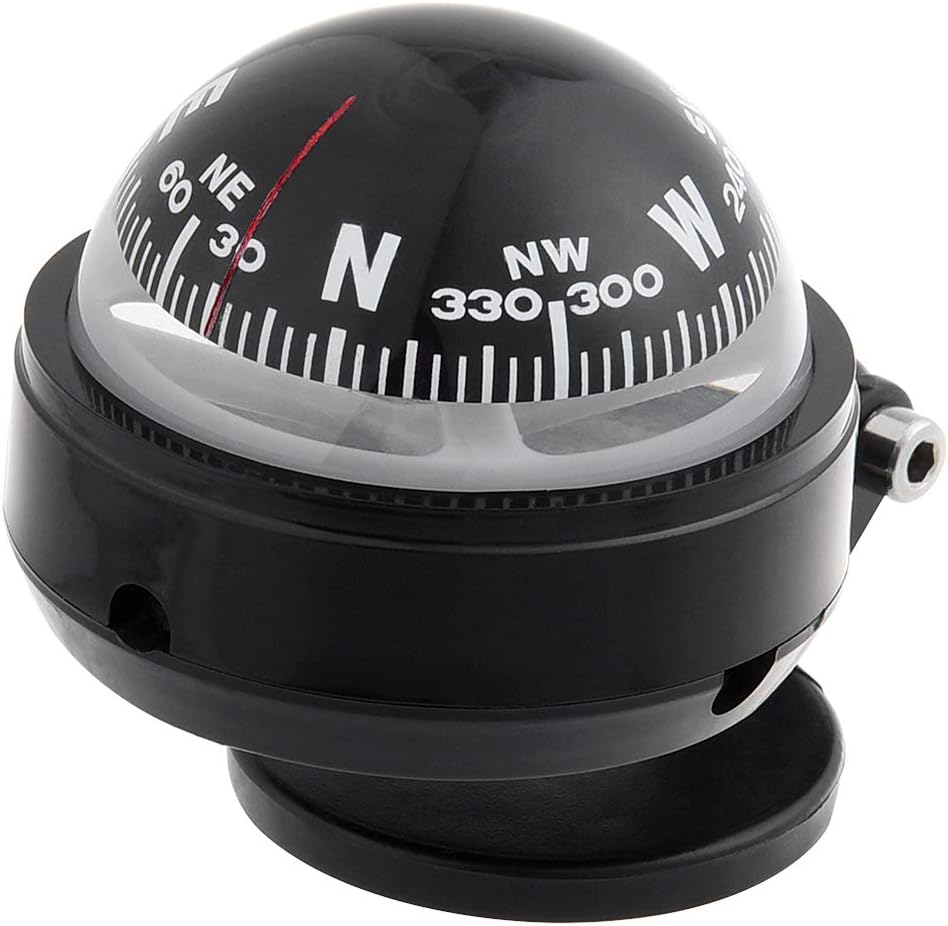
This model KIMISS/Keenso dashboard compass from this Amazon Listing:

Note: Read From the Side
You read this compass by looking at it edge-on, not top-down. If you hold the compass in your hand (like a bird you’re about to let fly away), point yourself so you’re looking north, and look at the edge of the compass at eye level, it should say “N”, indicating that you’re looking north.
If you look top down, the N will be on the south side of the compass. This is expected behaviour - you’ll be looking at it from the edge, not from the top.
What you’ll need
- The compass
- Something to spin the compass while keeping it centred
- A pointer that you can fix to a table
- A non-magnetic screwdriver
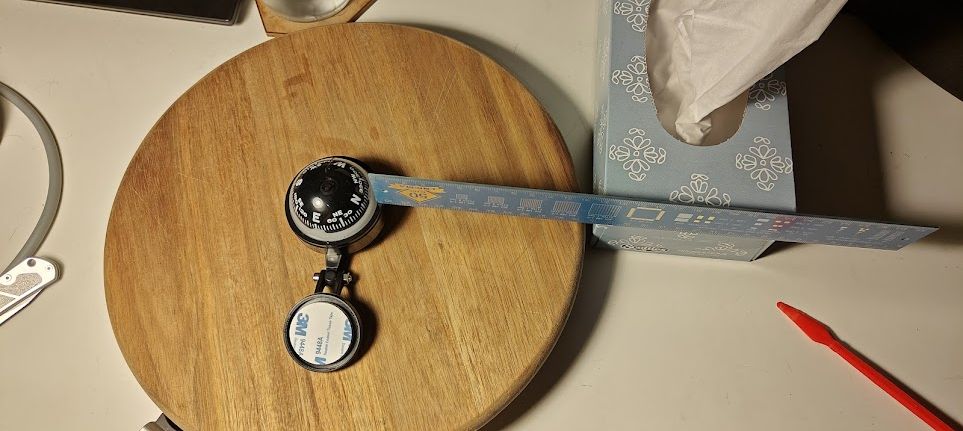
I used a ruler as a pointer and sticky-tacked it to a tissue box I had nearby, then put the compass on a lazy susan I had kicking around.
 You want to be able to rotate the compass housing while keeping the pointer aligned with the centre of rotation of the compass. You could skip the lazy susan and rotate the compass on the table so long as you re-align the pointer to point through the centre of rotation and don’t bump the pointer.
The non-magnetic screwdriver is important - I had some trouble adjusting the compass until I noticed that bringing the screwdriver nearby changed the heading by ~10 degrees.
Goal
You may be finding that the compass dome doesn’t settle in the same heading as you rotate the housing. The goal of calibrating the compass is to be able to turn the housing to any orientation and still have the compass dome pointing in the same direction.
Calibration Process
The two screw adjustment points should be labelled, one “N/S” and the other “E/W”. These screws seem to drive cams, so if you rotate the screw a full turn, you’ll be back at the same calibration position.
Setup
- Place the compass on the lazy susan so that it’s centered
- Place the pointer so that the line of the pointer passes through the center of rotation of the compass, and the pointer is near the edge of the compass for easy reading
- Note: the pointer doesn’t need to be aligned north/south, it just needs to stay at a consistent angle throughout the calibration. Don’t bump it!
Adjustment Process
- Rotate the compass so that the red line points north. Write down the heading that the pointer is reading.
- My pointer was reading around -5 deg
- Rotate the compass so that the red line points south. Write down the heading that the pointer is reading.
- My pointer was reading around -30 deg
- Take the average of those two readings to find the halfway point.
- ((-5) + (-30))/2 = -17.5
- Turn the N/S screw until the pointer is pointing at the halfway point.
- For me, I adjust until the pointer reads -17.5
- Repeat steps 1-4 until the pointer shows the same reading in both orientations
- Each loop through steps 1-4 should have a smaller range, and the average may shift slightly, e.g.
- Loop 1: (-5, -30) → -17.5
- Loop 2: (-10, -20) → -15
- Loop 3: (-15, -15) → DONE
- Each loop through steps 1-4 should have a smaller range, and the average may shift slightly, e.g.
- East-west adjustment is the same as the above, but alternating between pointing the red line east and west and using the “E/W” screw
If you know how to centre a 4-jaw chuck on a lathe, this is the same process.
Compass Dome Stuck Rotating With Housing
If the compass dome just rotates with the housing and doesn’t spin, check that the dome hasn’t come off the rotation pin by flipping the compass upside down, then back over again to re-seat it.
If the compass rotates a little, but seems attracted to part of the housing, the calibration is probably pretty far out of alignment.
As you spin each adjustment screw through a full turn, you should notice that the dome pulls strongly to one direction at some screw angle, then reverses and is pulled in the opposite direction when the screw is turned 180 degrees. Try to set the screw halfway between the two strong pull directions, which should set you up to begin the above calibration procedure.